
Intro
Nowadays, Webflow CMS has become popular, and many people prefer using Webflow websites for their online presence due to its highly advanced features. Let’s discuss the top 5 methods for creating sliders in Webflow to engage our visitors.
Why did we choose Sliders?
Today, we can present our content efficiently and effectively using minimal space by incorporating sliders. Sliders allow us to easily showcase images, content, or galleries without overwhelming the main page.
This approach not only optimizes space but also enhances user interaction, enabling you to engage with your audience more effectively and promote your products or offers in a more compelling way.
Now, let’s explore five methods to design custom sliders or carousels in Webflow
- Webflow Slider Components
- Integrate the Swiper JS Sliders
- Slick Slider
- OWL Carousels
- Goat Slider
1. Webflow Slider Components
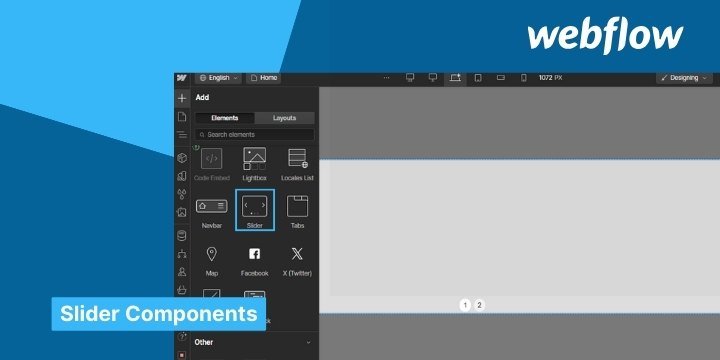
In Webflow, creating sliders with native components is a breeze. With just a few clicks, you can effortlessly integrate sleek and responsive sliders into your website design.
Utilizing Webflow’s intuitive drag-and-drop interface, you can customize each slide with ease, adding images, text, or any other content you desire. Plus, with built-in settings for navigation controls, autoplay options, and transition effects, you have full control over the functionality and aesthetics of your sliders.
Whether you’re showcasing products, highlighting portfolio pieces, or simply adding visual interest to your site, Webflow’s native slider components provide a seamless solution for creating stunning, interactive experiences.
Helping Material:
Webflow University: Webflow University is an excellent resource for learning the basics of Webflow sliders.
YouTube Tutorials: YouTube is an excellent resource for learning and applying custom design techniques in Webflow Slider.
2. Integrate the Swiper Js Slider

The most advanced method for implementing sliders on your website is by using Swiper JS. Renowned in the development community for its interactive and highly customizable sliders, Swiper JS offers unparalleled flexibility and functionality. It provides a wide range of customization options, allowing you to tailor the sliders to fit your needs.
Additionally, Swiper JS comes with its own set of templates that can be seamlessly integrated into your Webflow site, following their comprehensive guide. This makes it a powerful tool for creating engaging and visually appealing sliders.
How to Integrate Swiper JS Slider into Your Webflow Website
1. Implementing CDN
First, add the Swiper JS CDN to your Webflow project by including the CDN links in both the head and body sections of your site’s custom code settings.
2. Follow the Swiper Container Pattern
Now, let’s create the container pattern for the Swiper slider. We’ll start by setting up a Swiper container and then adding slides within this container. Make sure to apply the Swiper classes to both the container and the slides.
3. Customize and styling
After creating the Swiper container and slides, you can add content or images to the slides and style them accordingly. Some styling is essential for the Swiper slider, and you can find detailed customization information in this article.
4. Apply your Slider Snippets
Now, you can easily apply your favorite Swiper slider by adding the necessary code snippets to the body section code editor in Webflow. Adjust these code snippets as needed and customize them according to Swiper JS slider templates.
3. Slick Sliders
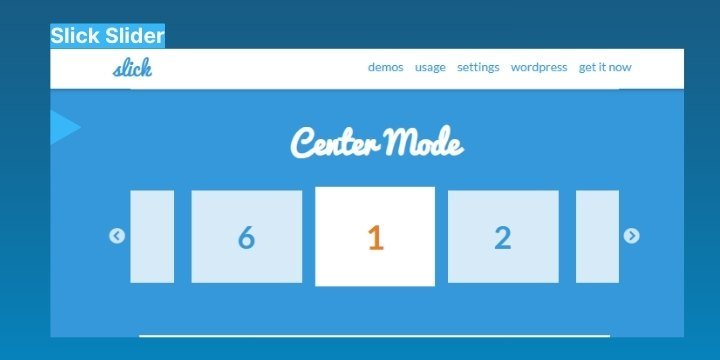
Slick Slider is another excellent option for creating sliders in Webflow. It provides full responsiveness and visually appealing designs, ensuring your sliders look great on any device. Slick Slider also comes with a variety of popular templates that you can use to quickly and easily implement sliders on your website.
These templates can be customized to match your site’s aesthetics, making it a versatile and powerful tool for enhancing your web design.
Why slick slider?
- Enhance User Engagement with Interactive Content
- Easy Customization and Responsive Design
4. Owl Carousel

Owl Carousel is a popular slider widely used on many websites due to its attractive carousel styles. It is highly interactive and engaging for visitors, making it a valuable addition to any site. While integrating Owl Carousel into a Webflow website does require some development knowledge, it is achievable with the right guidance.
Additionally, some Webflow templates already include Owl Carousel, making it easy to implement and clone. For a detailed guide on Owl Carousel, you can visit the following link to explore its features and see examples.
Features of Owl Carousel
- Highly Interactive and Engaging
- Customizable Styles
- Responsive Design
- Autoplay and Looping
- Navigation and Pagination
- Multiple Items Display
- Lazy Loading
- Easy Integration
- Webflow Template Availability
5. Goat Slider

An easy way to implement sliders in Webflow is by using the Webflow app called Goat Slider. This new app allows for easy integration of sliders, offering highly engaging templates and carousels that can significantly enhance your site.
Goat Slider features a drag-and-drop interface, making it simple to use and customizable for anyone, without requiring any development knowledge.
Why Goat Slider
- Ease of Use
- Drag & Drop Interfaces
- Premium Templates
- Component feature
Conclusion
In conclusion, creating sliders in Webflow can be achieved through various methods. For simple or beginner-level sliders, you can use the built-in Webflow components or the Webflow sliders app. However, for more advanced and creative sliders, integrating popular libraries like Swiper JS, Owl Carousel, or Slick Slider is recommended.
Ready to transform your online presence with Webflow? Contact Weboxy Technology, a leading Webflow development agency, for stunning, high-performing websites that captivate your audience!