Next and Previous (Next/Prev) post navigation is a critical feature for blogs, news websites, and content-heavy platforms. It enhances user experience by encouraging visitors to explore more content, reduces bounce rates, and improves SEO by creating internal linking structures. In this guide, you’ll learn how to implement Next/Prev post navigation in Webflow using native tools and custom code snippets, while optimizing for SEO and ranking factors.
Why Next/Prev Navigation Matters
1. User Experience (UX) Benefits
- Reduces Bounce Rate: Visitors stay longer when they can easily navigate to related content.
- Improves Engagement: A clear path to “next” or “previous” posts keeps readers hooked.
- Mobile-Friendly Navigation: Buttons simplify content discovery on smaller screens.
2. SEO Advantages
- Internal Linking: Search engines like Google prioritize websites with strong internal linking for crawling and indexing.
- Dwell Time: Longer session durations signal high-quality content to search engines.
- Lower Exit Rates: Smooth navigation keeps users on your site, improving SEO metrics.
Implementing Next/Prev Post Navigation in Webflow
This process is smooth and hassle-free—just follow the step-by-step guide below, and you’ll easily set up Next and Prev Post Navigation in Webflow without any complications. 🚀
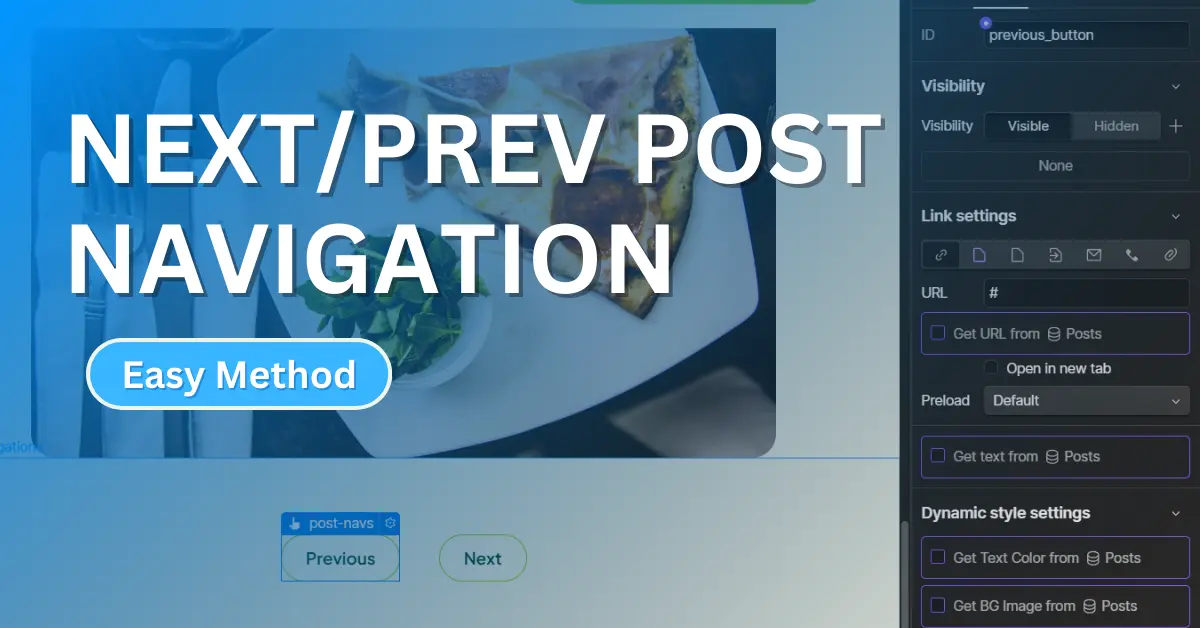
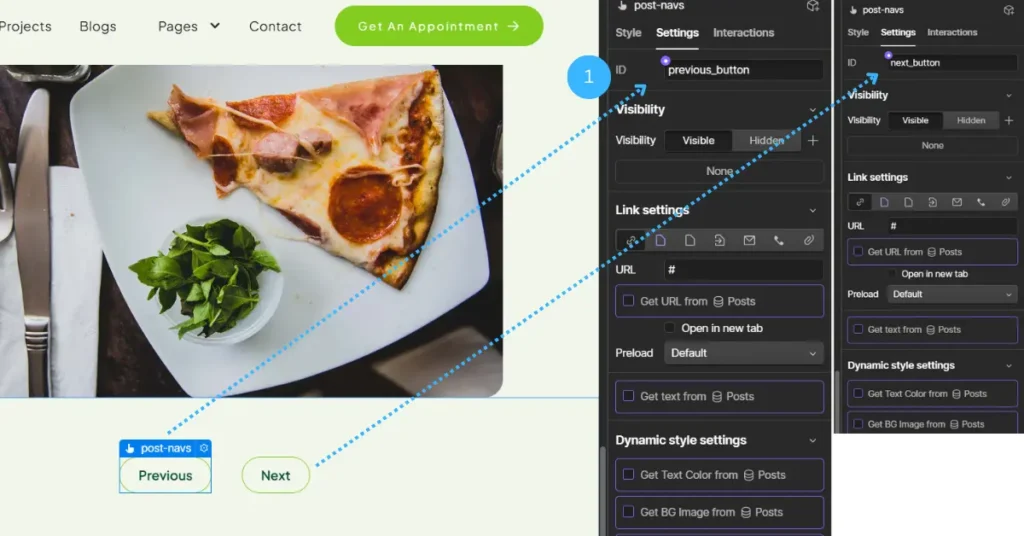
Step 1: Create Navigation Buttons
To begin, you’ll need to add two buttons—one for navigating to the next post and one for the previous post.
- Open Webflow and navigate to the Blog Post Template Page where you want to place these buttons.
- Drag two Button (or DIV) elements onto the page.
- Rename them as follows:
- Next Post Button → Assign an ID of
next_button - Previous Post Button → Assign an ID of
previous_button
- Next Post Button → Assign an ID of
Step 2: Connecting CMS Collection to Your Blog Posts
In this step, you’ll integrate your CMS Collection to dynamically pull blog posts and create navigation links for the Next and Previous post buttons.
Add a CMS Collection List
- Scroll to the end of your blog post page in Webflow.
- Drag a Collection List element onto the page.
- In the Collection Settings, connect it to your Post Collection.
Add a Text Link Inside the Collection Item
- Inside the Collection List, drag a Text Link element. (imp)
- This text link will serve as the Current Blog Post.
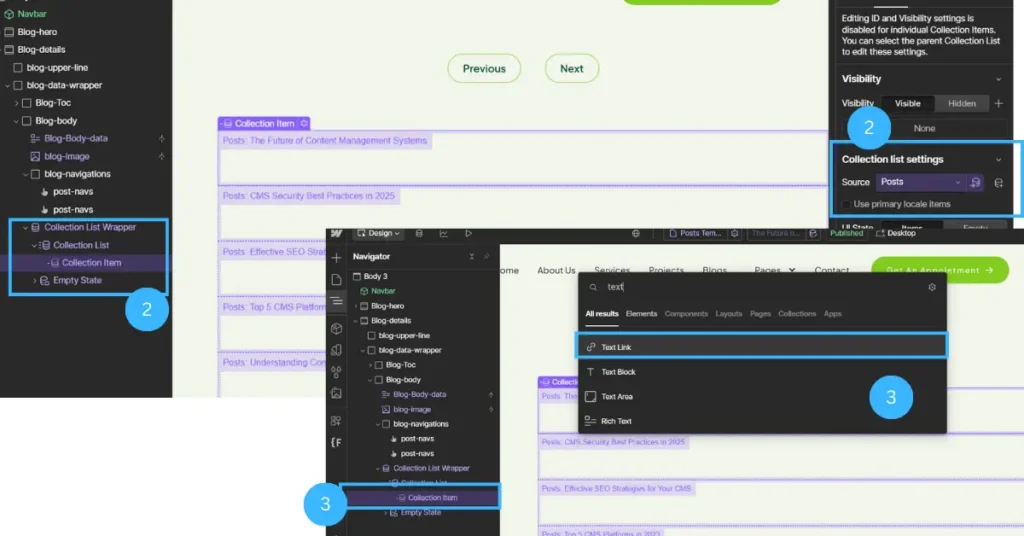
Enable Dynamic Linking
- Click on the Text Link element to select it.
- Navigate to the Settings (⚙️) Panel.
- Under Link Settings, choose Collection Page Link as shown in below img.
- Select CMS Field as the dynamic link source.( name, category etc.)

Step 3: Add JavaScript Code Snipets
Open Page Settings of the CMS Post Template, scroll down to the Custom Code section, and paste the following script inside the <body> section.
<script>
var Webflow = Webflow || [];
Webflow.push(function () {
    const currentUrl = window.location.href;
    const all_items = document.querySelectorAll(".w-dyn-item");
    const all_valid_hrefs = [];

    for (let i = 0; i < all_items.length; i++) {
        const item = all_items[i];
        const anchor = item.querySelector('a');

        if (anchor && !anchor.classList.contains('w-condition-invisible')) {
            all_valid_hrefs.push(anchor.href);
        }
    }

    function getOwnIndexByURL() {
        for (let i = 0; i < all_valid_hrefs.length; i++) {
            if (currentUrl.includes(all_valid_hrefs[i])) {
                return i;
            }
        }

        // fallback: find closest match
        for (let i = 0; i < all_valid_hrefs.length; i++) {
            if (currentUrl.endsWith(new URL(all_valid_hrefs[i]).pathname)) {
                return i;
            }
        }

        return -1;
    }

    const own_index = getOwnIndexByURL();
    if (own_index === -1) {
        console.warn('Current blog post not found by URL match.');
        return;
    }

    const next_href = all_valid_hrefs[own_index + 1] || all_valid_hrefs[0];
    const previous_href = all_valid_hrefs[own_index - 1] || all_valid_hrefs[all_valid_hrefs.length - 1];

    console.log('Detected current index:', own_index);
    console.log('Next Post:', next_href);
    console.log('Previous Post:', previous_href);

    document.querySelector('#next')?.setAttribute('href', next_href);
    document.querySelector('#prev')?.setAttribute('href', previous_href);
});
</script>
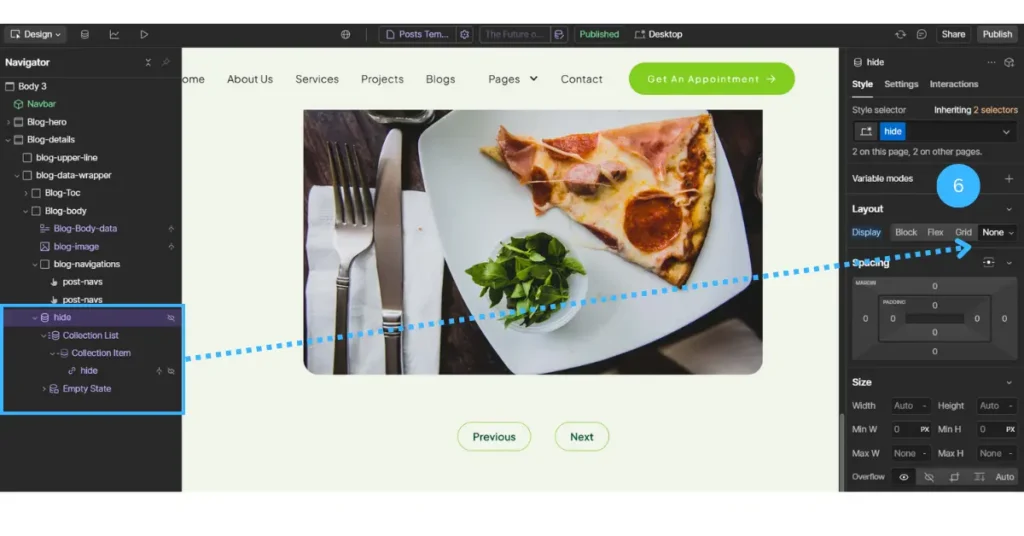
Step 4: Hide CMS Collection And Links
Now, in this final step, go to the page, hide the Collection List and the Text Link, then publish and test your pages to ensure everything works smoothly.
Other Resources: Finsweets CMS
Other tools like Finsweet’s CMS Previous & Next use a more advanced setup, focusing on CMS item navigation rather than straightforward Next and Previous buttons for blog posts.
While Finsweet provides powerful CMS solutions, their method can be complex for beginners as it requires additional setup and deeper understanding of Webflow CMS structure. Unfortunately, their documentation does not always cover the basic step-by-step implementation needed for a straightforward Next and Prev Post button navigation.
In contrast, this guide simplifies the process, ensuring you can easily set up Next and Previous buttons in Webflow without extra workarounds or complicated CMS filtering techniques. 🚀
If this guide helped you, check out our other Webflow tutorials!