What are Cookies?
Cookies are tiny data files that websites place on a visitor’s device when they access a webpage. These files contain information about the user’s interaction with the site, such as login details, preferences, and browsing activity. Cookies enhance user experience by remembering settings and personalizing the site’s content for future visits. There are various types of cookies, including:
- Session Cookies: These are temporary files that are deleted as soon as the browser is closed.
- Persistent Cookies: Stored on the device for a specific period, even after closing the browser.
- Third-party Cookies: Placed by external services (like ads) to track behavior across different websites.
Now in this blog, we cover How to Enable Cookies in Webflow with CookieYes, along with tips to enhance your website’s functionality and ensure legal compliance.
Why Enable Cookies on Webflow Websites?
Enabling cookies on every website is crucial for several reasons:
- Enhanced User Experience: Cookies allow your website to remember user preferences (like language or currency settings), making the browsing experience more personalized and efficient.
- Analytics and Insights: Cookies help track user behavior on your site, allowing you to gather valuable data through tools like Google Analytics. This information is essential for optimizing content and improving website performance.
- Marketing and Retargeting: Cookies enable targeted advertising by tracking visitor activity across the web. This allows businesses to serve personalized ads and promotions to users who have previously interacted with their site.
- Legal Compliance: If your site caters to audiences in regions like the EU, enabling cookies ensures compliance with data privacy laws, such as the GDPR and CCPA. Implementing a cookie consent management system, like CookieYes, helps ensure that you collect user consent before storing cookies.
By setting up cookies on your Webflow site, you not only enhance usability but also maintain legal compliance, leading to a safer and more personalized browsing experience for your visitors.
How to Enable Cookies in Webflow with CookieYes
CookieYes is a popular solution for managing cookie consent, enabling website owners to adhere to privacy laws such as GDPR, CCPA, and other international data protection regulations. It provides an easy-to-use platform for managing cookie consent on websites, ensuring that users have control over the cookies being stored on their devices.
Pricing:
CookieYes offers flexible pricing plans tailored to different needs.
- The Free plan is ideal for blogs and personal websites, providing 100 pages per scan and 25,000 pageviews per month.
- For small businesses, the Basic plan costs $10/month per domain, allowing 600 pages per scan, 100,000 pageviews, and custom branding.
- The Pro plan, priced at $20/month per domain, caters to medium businesses with growing traffic. It supports 4,000 pages per scan, 300,000 pageviews per month, and includes geo-targeted cookie banners for more advanced customization.
By integrating CookieYes, websites can automatically display customizable cookie banners, giving users the option to accept or reject cookies according to their preferences.
Step1: Overview of CookieYes for Cookie Management
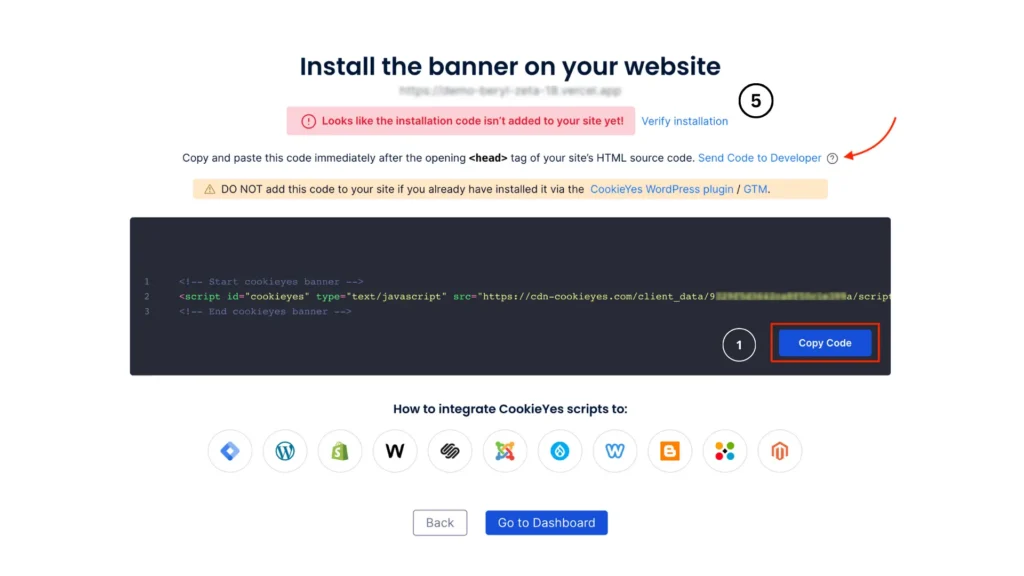
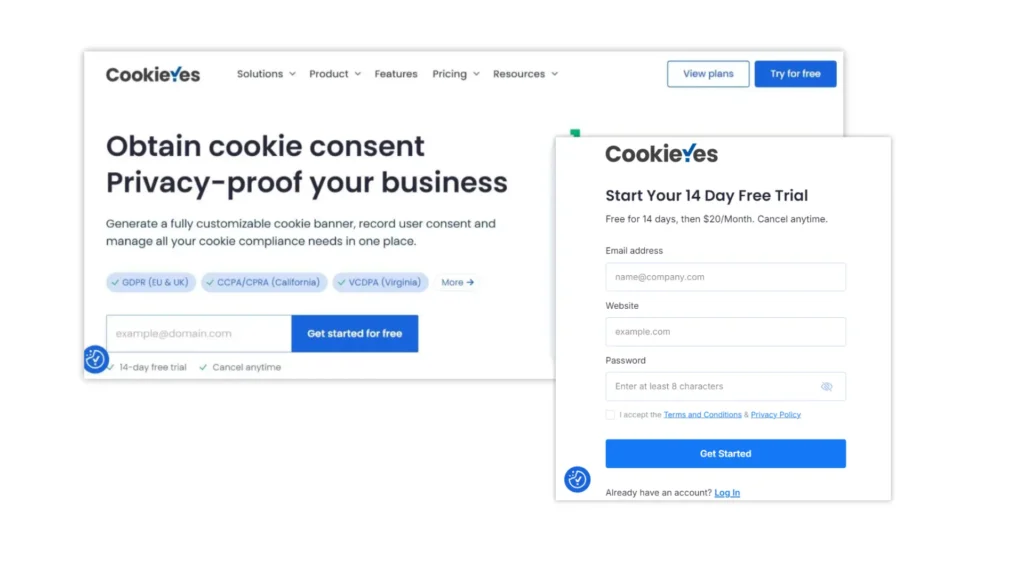
Let’s start by creating an account. Simply sign up on CookieYes and verify your email. Once verified, you can easily generate the cookie consent script. After that, copy the code snippet and move on to your Webflow workspace, where you’ll embed it.

Next, open your Webflow workspace and select the website you want to add the cookie consent script to. Click on the Settings page of the selected project. Once there, navigate to the Custom Code section. Scroll down to the Head section, and paste the copied CookieYes script.
Now, by following the numbered guide, you’ll return to CookieYes and click on Verify Installation as shown in step 5. This will ensure the script is correctly implemented on your Webflow site, as illustrated in the image above.
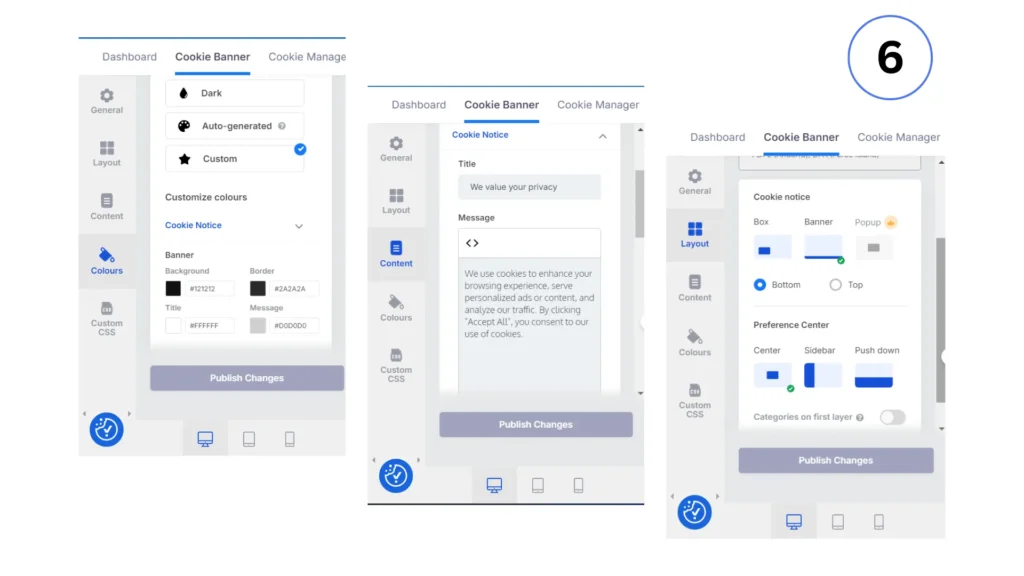
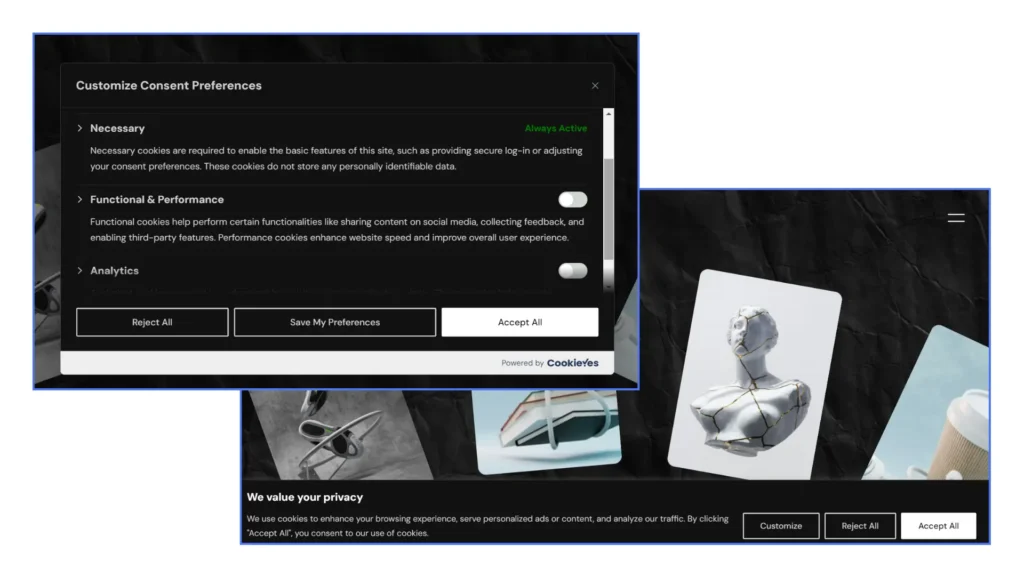
Now it’s time to set up the cookie consent layout and presets for your site. There are two main types: small boxes or pop-ups and banners. Select your preferred preset, and you’ll see a live preview of how it will appear on your site on the right side of the cookie banner section.
On the left side, you’ll find the customization panel, where you can edit and adjust the content. This panel lets you customize the layout settings, modify the text, change colors, and apply custom styling options to fit your brand.
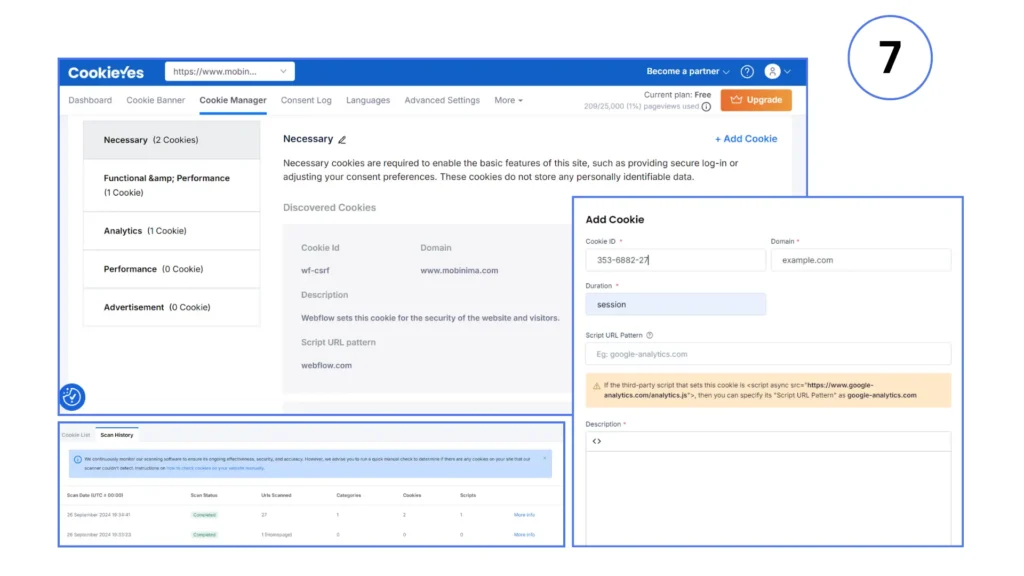
The next step is setting up Cookie management, where you can customize different types of cookie consent data such as Functional, Analytics, Advertising, Performance, and Necessary. By default, Necessary cookies are enabled, while the other categories can be customized based on your preferences.
You can edit the headings, descriptions, and add cookies to manage specific data fields. Additionally, you can configure the cookie ID, domain, duration, source, and other relevant details. This allows visitors to choose which types of cookies they want to allow on your site.
After setting up the Cookie Lists, you can hide the ones you don’t need. Next, preview your site to test the cookie consent experience and see which options are necessary or can be adjusted to fit your needs. Once everything is in place, your cookie management dashboard will display a scan history of all cookies detected on your site.
After adjusting the cookie list, you’re almost done. Save the changes and check the results. If you selected “Accept All” it will save, and the cookies will not be available for testing after refreshing.
To test further, use the Inspect tool, navigate to the Application tab, select “Cookies,” and then delete them before refreshing the page for additional testing.
Benefits of Using CookieYes for GDPR Compliance
Automated Cookie Consent: CookieYes simplifies the process of obtaining user consent by automatically generating and displaying a cookie consent banner. This ensures that your website complies with GDPR regulations, which require user consent before storing cookies on their devices.
Personalized Consent Banner: CookieYes allows you to tailor your cookie banner’s design to align with your website’s aesthetics, ensuring a cohesive user experience.
Cookie Scanning and Classification: CookieYes automatically scans your website to detect the cookies it uses, then classifies them into categories like necessary, marketing, or analytics. This helps you stay compliant by providing transparency on the cookies your site employs.
User-Friendly Dashboard: CookieYes offers an intuitive dashboard that allows you to manage consent records, view reports, and adjust your cookie settings with ease. This feature is essential for maintaining ongoing compliance with data privacy laws.
Multi-language Support: Since GDPR compliance applies across the EU, CookieYes supports multiple languages, allowing you to provide cookie consent information to users in their native language. This enhances user experience and ensures clear communication regarding their privacy choices.
Using CookieYes for cookie management not only keeps your Webflow site legally compliant but also builds trust with your users by offering transparent and straightforward cookie consent options.
Conclusion: Why CookieYes is Ideal for Webflow Users?
For Webflow users, integrating a reliable and compliant cookie consent solution is crucial for meeting privacy regulations like GDPR and CCPA. CookieYes stands out as the ideal choice due to its user-friendly setup, comprehensive features, and affordable pricing.
Unlike other cookie consent tools, which may be overly complex or highly priced, CookieYes offers a professional yet cost-effective solution. Many Webflow-specific cookie consent apps lack the functionality and flexibility required for proper compliance, and their premium pricing can be a burden for small businesses.
CookieYes provides an accessible alternative with essential features like customizable banners, geo-targeting, and multi-language support, making it perfect for users looking to maintain compliance without the hefty costs.
With its straightforward integration and robust capabilities, CookieYes is a smart, affordable option for any Webflow project.
For more Webflow tips, check out our Guide to Webflow SEO, or explore our Webflow categories to boost your Webflow growth efficiently.