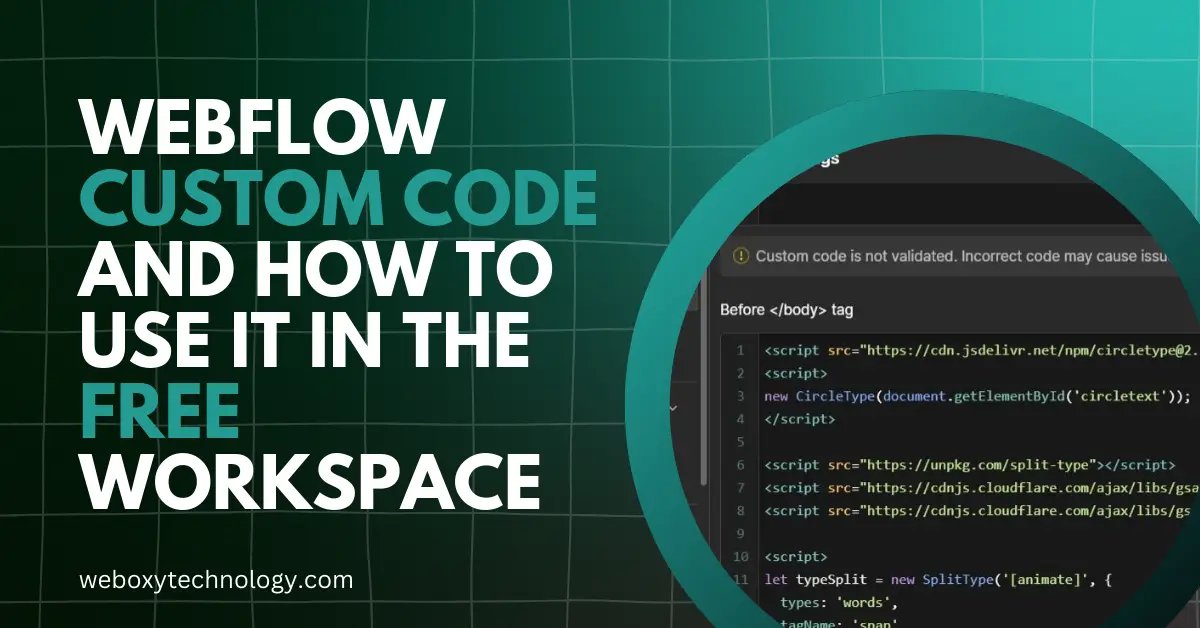
Overview of Webflow Custom Code:
Webflow isn’t just a drag-and-drop builder; it also offers robust development features. It provides extensive custom code capabilities, allowing you to integrate custom designs and functionalities into your Webflow projects.
With Webflow’s custom code, businesses can create unique branding and have the flexibility to embed custom code, enhancing their website’s environment.
Why Custom Code is Important?
Webflow’s custom code transforms it from a basic drag-and-drop tool to a platform that unlocks developers’ creativity for truly unique solutions.
Without this feature, Webflow would merely be a basic drag-and-drop tool. However, its custom code capabilities unlock the full potential of developers, allowing them to unleash their creativity and craft truly unique solutions.
It’s important to note that Webflow currently supports only three main web development languages:
- HTML
- CSS
- JavaScript.
However, it is also testing a new React development UI setup called Dev Link in beta, which could meet developers’ needs and enhance Webflow’s productivity in the future.
Getting Started with Custom Code in Webflow
To start using custom code in Webflow, you’ll need to purchase a paid Webflow workspace. This will unlock the ability to add your own HTML, CSS, and JavaScript, allowing you to fully explore your creative ideas.
You can also add custom code directly to your designer pages or through your site settings. To easily save your progress, use Cmd + Shift + S on a Mac or Ctrl + Shift + S on Windows.
Webflow’s free workspace restricts custom code usage, limiting site-wide custom code and the amount of code you can add. However, if you’re interested in using custom code in a free workspace, you can read the below trick to enable these features.
Embedded Code Limits
When using Webflow’s custom embedded code features, you’ll encounter specific limits: up to 10,000 characters per Embed element in the Designer and a total of 20,000 characters for the entire site.
These limits help streamline the coding process, enabling you to scale your business efficiently without relying on extensive raw code. This approach not only simplifies development but also ensures your site remains performant by managing code more effectively.
Best Practices
Writing clean and efficient code is crucial for maintaining performance and readability. Testing and debugging custom code ensure that your website functions correctly and is free of errors.
Additionally, maintaining cross-browser compatibility ensures that your site provides a consistent experience for all users, regardless of their browser choice.
Advanced Tips and Tricks
Leveraging JavaScript and CSS can significantly enhance your website’s functionality, allowing for dynamic features and custom styling. By integrating these technologies, you can create interactive elements and visually appealing designs that improve user engagement.
Incorporating external libraries and frameworks can streamline development, offering pre-built components and tools to speed up your workflow. Additionally, managing code effectively ensures that your site is responsive and looks great on all devices, providing a seamless experience for every user.
Guide to Using Custom Code in a Free Webflow Workspace
1. Sign Up and Create Sites: Register for a free Webflow account. This allows you to create up to two sites with two pages each, setting the stage for using custom code.
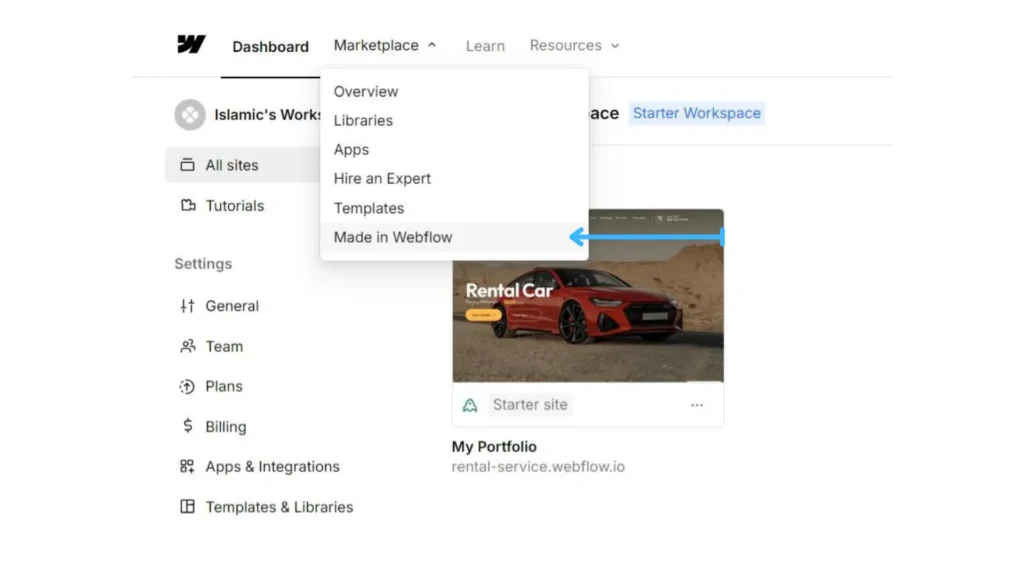
After signing up, you’ll be redirected to the “Made in Webflow” page because you opted to use a clonable template instead of starting with a blank site.
2. Select a Cloneable Template: Find and clone a Webflow template that includes custom coding features. Templates with interactive elements, like sliders, are often a good choice as they demonstrate custom code usage.

3. Prepare the Template: Open your cloned template and remove all content, classes, and layouts to start with a clean design. This provides a fresh workspace while preserving the ability to use custom code.

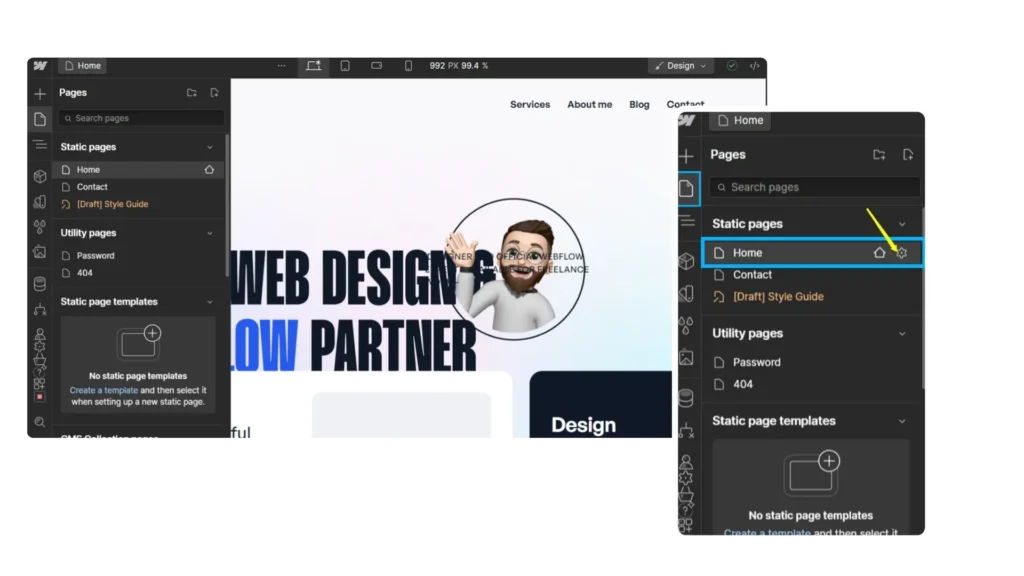
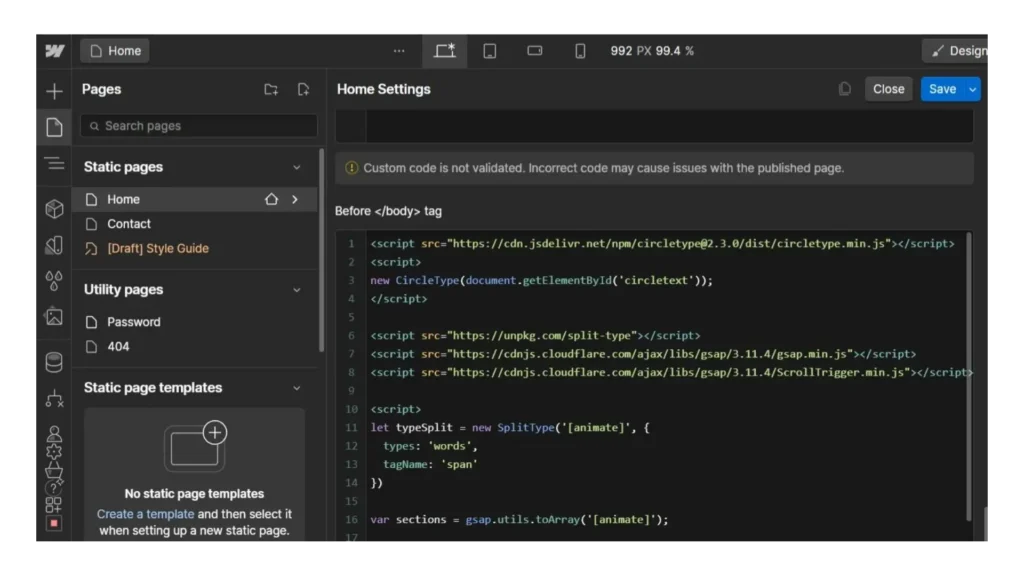
4. Access Custom Code Settings: Go to the page settings of your template. Here, you’ll be able to view and utilize the custom code sections that were included by the template’s creator.
5. Verify and Modify Code: Check if there’s existing code in the custom code sections. If present, you can edit or add your own code. If not, try a different cloneable template with the necessary custom code features.
Limitations and Considerations
When working with custom code in Webflow’s free workspace, there are important limitations and considerations to keep in mind:
1. Limited Access to Custom Code Panels:
- Designer Page Settings Only: Free workspace users can only add custom code through the Designer page settings. This means you can include code in the <head> or before the </body> tag of individual pages, but you don’t have access to site-wide custom code panels found in paid plans.
- No Embedded Code Elements: You cannot use the embedded code elements feature to add custom code directly into your page content or layouts. This restriction limits your ability to inject scripts and styles dynamically within the body of your pages.
2. Restrictions on Site-Wide Customization:
- No Global Custom Code: Unlike paid plans, where you can apply custom code site-wide via the site settings, the free workspace does not offer this capability. This limitation means you can’t easily apply JavaScript or CSS across all pages of your site from a central location.
3. Design and Functionality Constraints:
- Page-Specific Customization: Since custom code is confined to individual pages, managing and maintaining consistent functionality or design enhancements across multiple pages can be challenging. Each page will need to be configured separately if you want to apply the same custom code.
- Complex Implementations: Implementing more complex features or integrations that require global code changes or site-wide settings might not be feasible in the free workspace due to these limitations.
4. Workarounds and Best Practices:
- Utilize Page-Specific Code: Focus on leveraging the custom code functionality within the Designer page settings to enhance individual pages. Optimize your use of this feature by ensuring that each page is customized to meet your needs as effectively as possible.
- Minimize Code Use: Given the constraints, try to minimize the reliance on custom code where possible. Utilize Webflow’s built-in tools and integrations to achieve your design and functionality goals without extensive custom code.
Understanding these limitations and considerations will help you effectively navigate the use of custom code in Webflow’s free workspace, enabling you to make the most of the available features while working within the constraints of the free plan.
Ready to transform your online presence with Webflow? Contact Weboxy Technology, a leading Webflow development agency, for stunning, high-performing websites that captivate your audience!